One of the first articles I read about photography that stuck with me was about exposing to the right of the histogram to produce the best image. Exposing to the right generally translates to overexposing an image so you can bring it back in post processing. It’s more complicated than that and the article still has a lot of practical applications in modern photography. I generally like my final edited exposure to be on the over exposed side for the pleasant skin tones and warm feel so exposing to the right worked great for a very long time.
If I were shooting film I would still shoot to the right on a regular basis. A lot of film stocks make skin tones look absolutely gorgeous when they are overexposed by a couple(6?!) stops. Digital photography is a different beast though. Modern cameras hold a ton, if not ridiculous amount of details in the shadows compared to even a couple years ago. So much detail can be recovered from the shadows that it’s changed the way I approach taking photos in a lot of scenes.
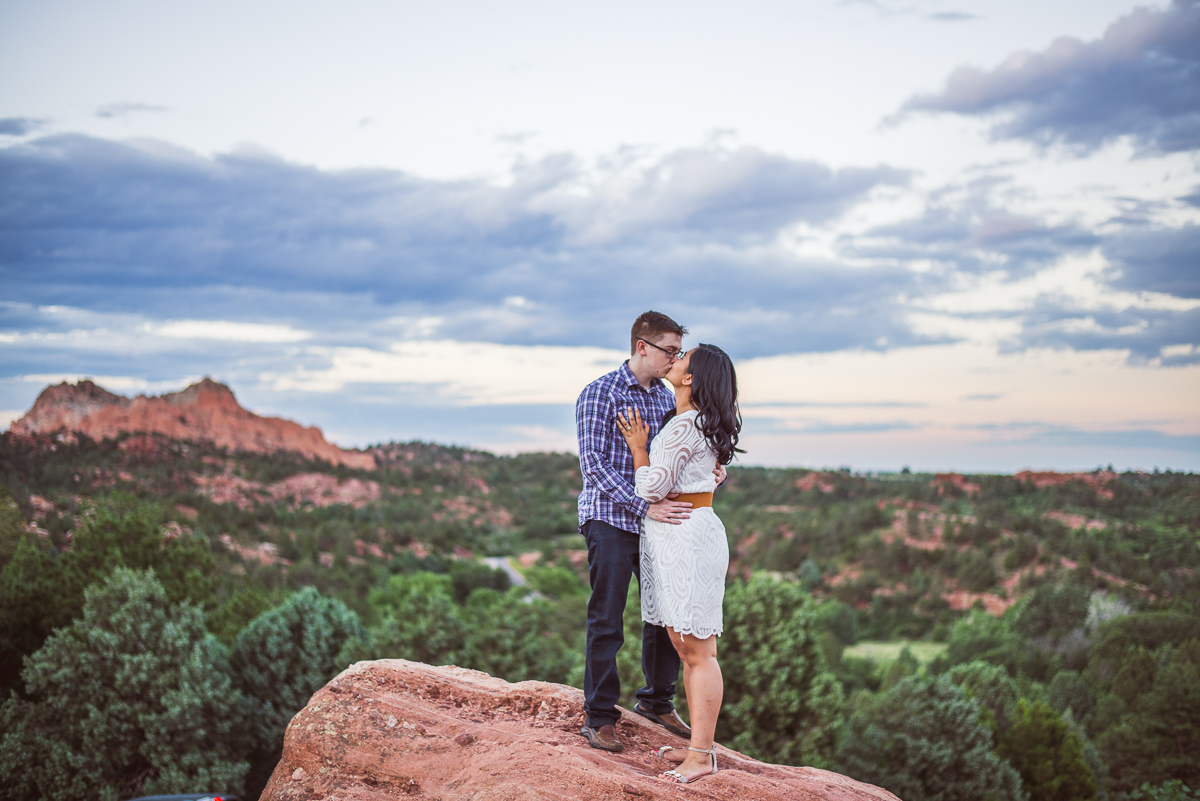
Lets take the top image as an example. It’s one of my favorites and I liked it so much that it’s the first photo on the banner of my home page. To set the scene, it’s October and it’s about 6:45 PM. The sun is setting right behind the Flatiron Mountains in Boulder, Colorado. We’ve been waiting for something like 30 minutes for some color to appear in the sky. It’s not quite dark but it’s getting there and it’s getting pretty chilly. Since we are standing at the base of a couple fairly large mountains, there is a lot of light glowing just behind the peaks. If I expose the image for the skin tones of Katie and DJ then the sky is going to blow out behind the mountains and there’s going to be a weird halo of light in the sky when I try to recover the highlights. You’ll see an example of this a couple images down. My other options are to use a flash or two to light them up while keeping the color and clouds in the sky or to overexpose the image completely and have a fairly uniform but blown out glowing sky. If those are my only options I’m going to overexpose the sky and I’ll be pretty happy with the image. Flashes are great but I don’t like to carry that much stuff and the resulting image usually isn’t my style. The warmth and glow from shooting images at dusk is so pleasing that I’m willing to sacrifice the sky for the look I want.
But there’s a third option. I can’t speak much for Canon or Sony cameras(although I’m sure they behave the same) but on my Nikon D750 and D600 cameras I can underexpose the image by a lot and recover the shadows in post and the image that comes out of Lightroom blows me away. There isn’t even all that much work involved.
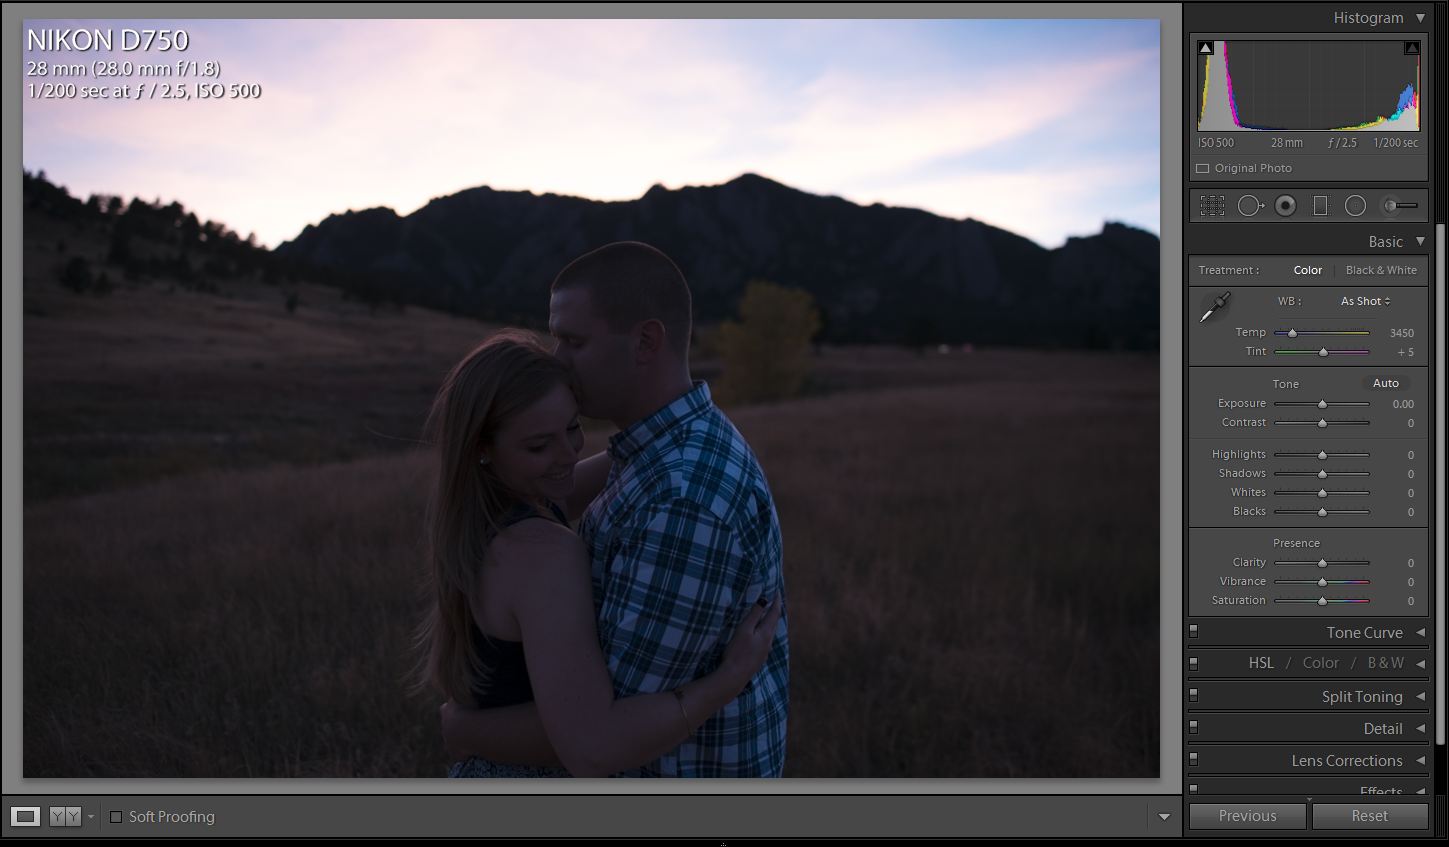
The image below is straight out of camera. If I didn’t know what could come out of this file I would be pretty quick to delete this image. It’s way too dark, right?
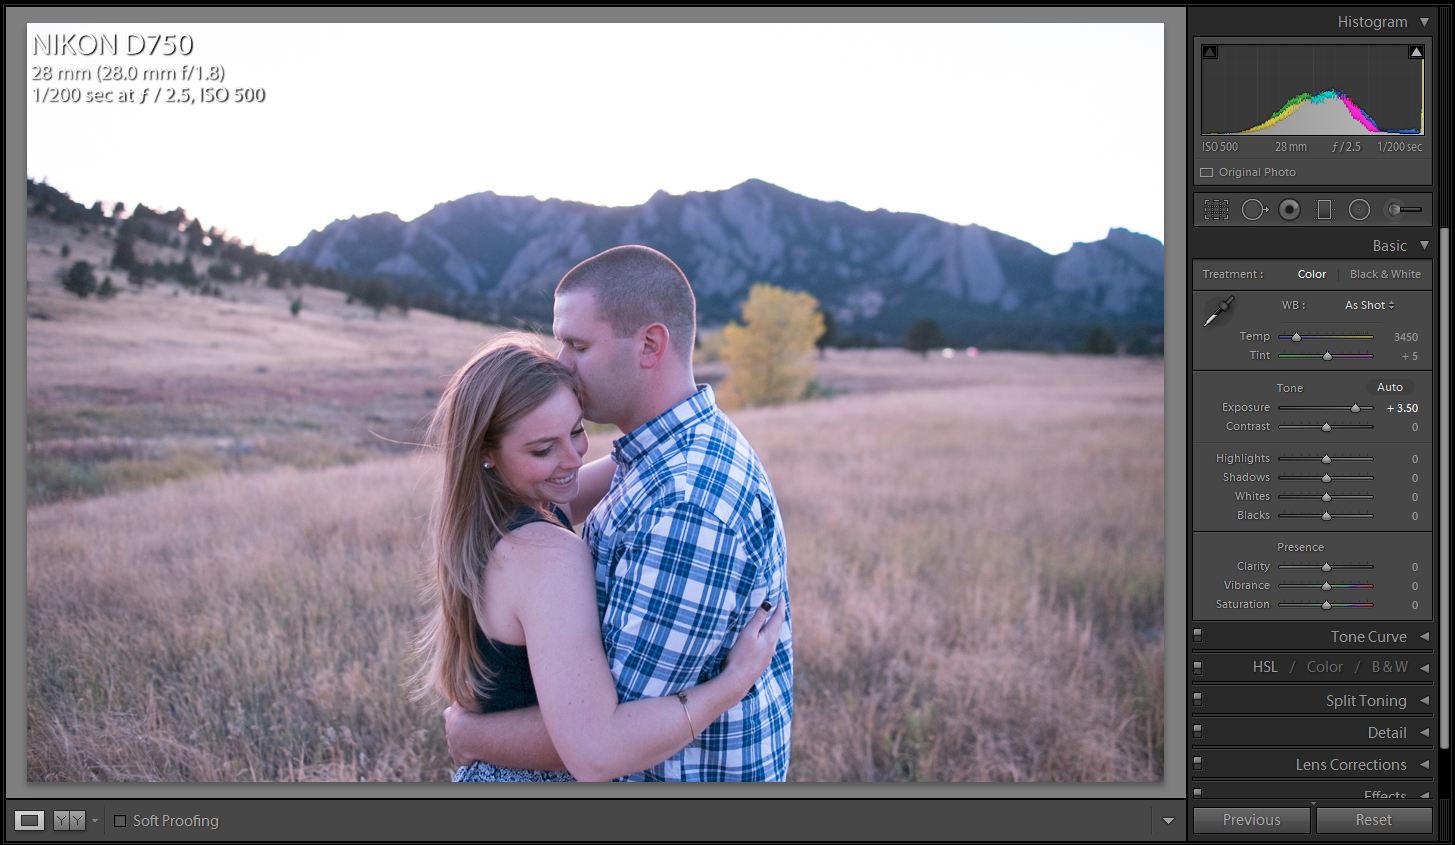
Adjusting only the Exposure slider in Lightroom says this photo is at least 3 and a half stops underexposed of where I want the skin tones to be. The file now looks fairly similar to how the image would look if I exposed for their skin properly. The sky would be pretty white and there wouldn’t be much info to recover if I wanted to. The clouds and color that we were waiting for don’t seem to exist.
When I drop the highlights down to -100 and the shadows up to +100 I now only need to increase the image by just under 1 stop to get nice skin but I’ve now gained that color and cloud definition back in the sky. The warmth is mostly from increased white balance. Add a little contrast and tweak the black and white sliders and we’ve now got ourselves an image with some punch. Full disclaimer, I think I did use an adjustment brush to bring the sky exposure down a little bit more but not much. I’m pretty sloppy with my brush adjustments so I try not to go too crazy on those.
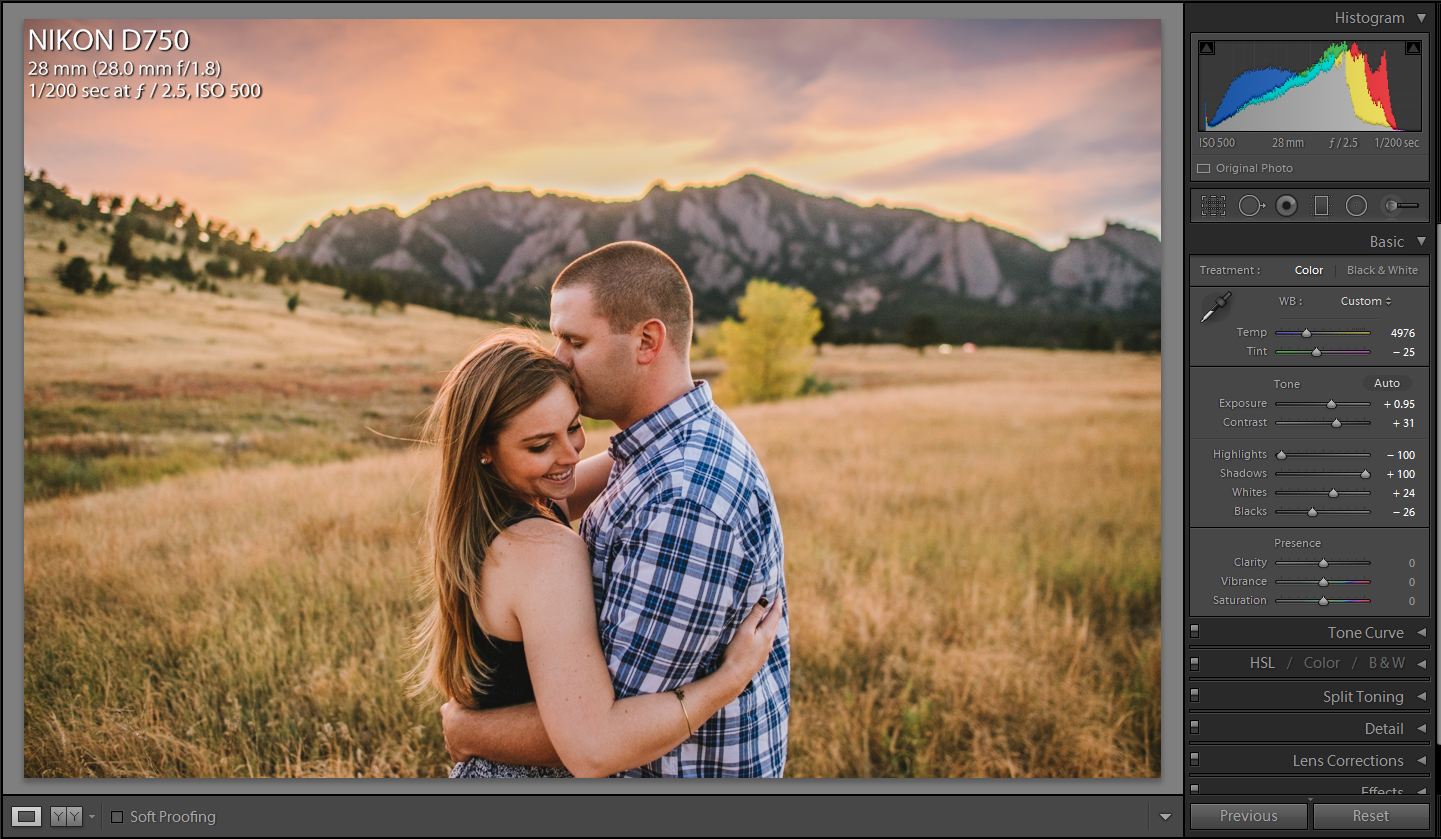
What’s the downside to this? If there is one it’s that you get a little more noise/grain in the image than the cleaner exposure would get, but considering how many people are adding artificial grain to images these days it could even be an upside for some people. I personally don’t add any artificial grain to images any more, but I think this is pleasing and moody.
The image below will show an example of that halo effect I mentioned above. This image is still underexposed but this one is closer to 1.5 stops underexposed going by the skin tones. It’s overexposed for the sky though. Straight out of camera image below.
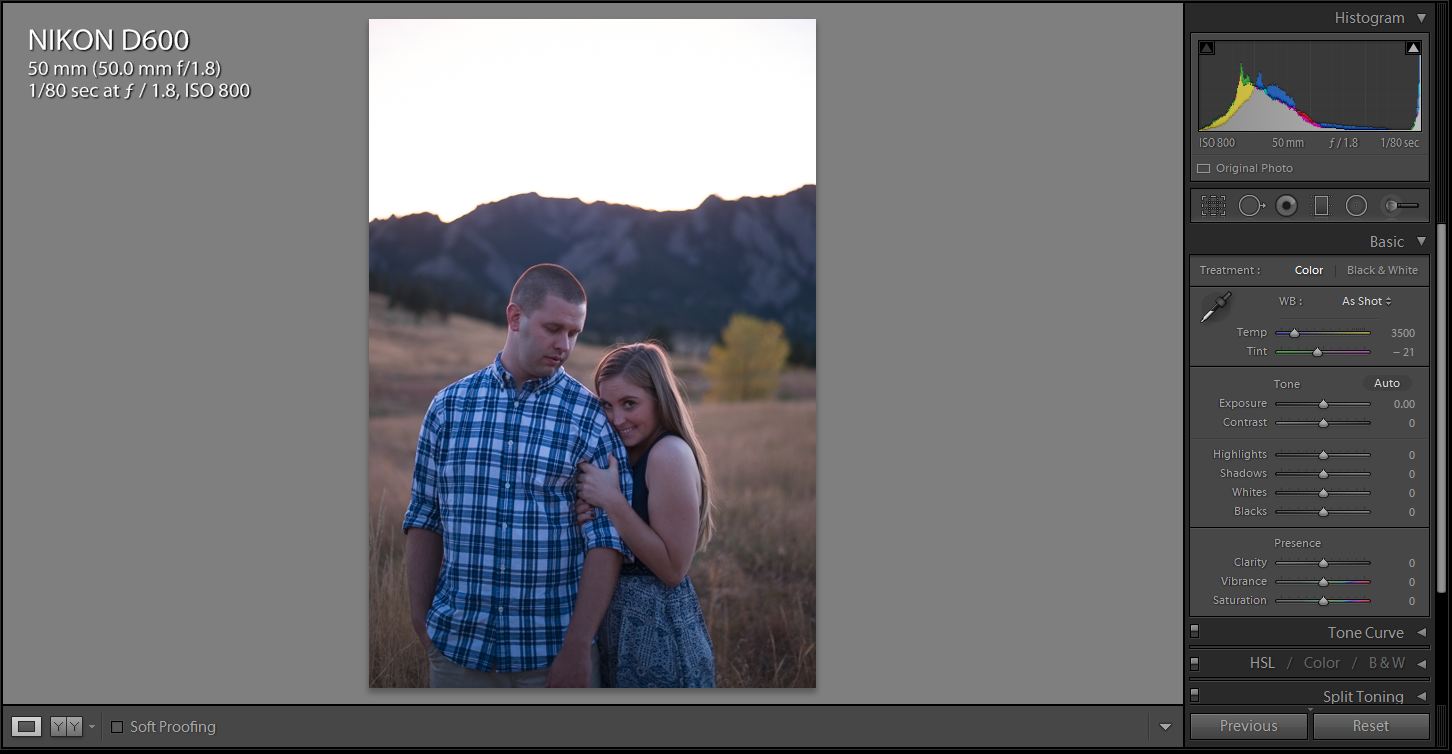
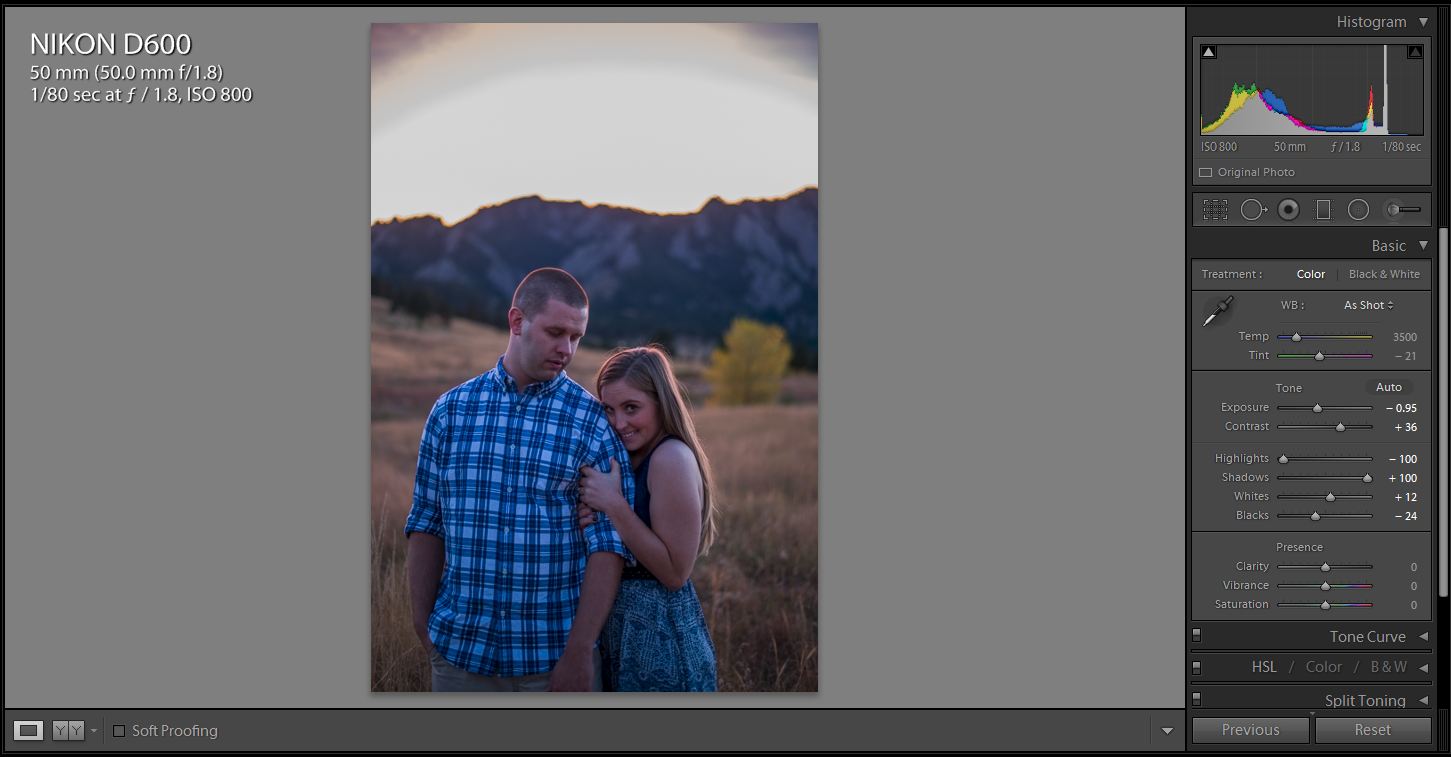
You can see below that even trying to save the sky by lowering the highlights by 100 and exposure by another full stop won’t save that sky. It’s so bright behind the mountains that the data is just lost. Any attempt to recover the sky just makes it look like there’s something exploding behind them.
The image below is close to how the image was delivered. You’ve got a nice glow in the sky and there can still be some nice color but it’s not as dynamic as the first photo and doesn’t represent the scene that we waited an extra 30 cold minutes for.
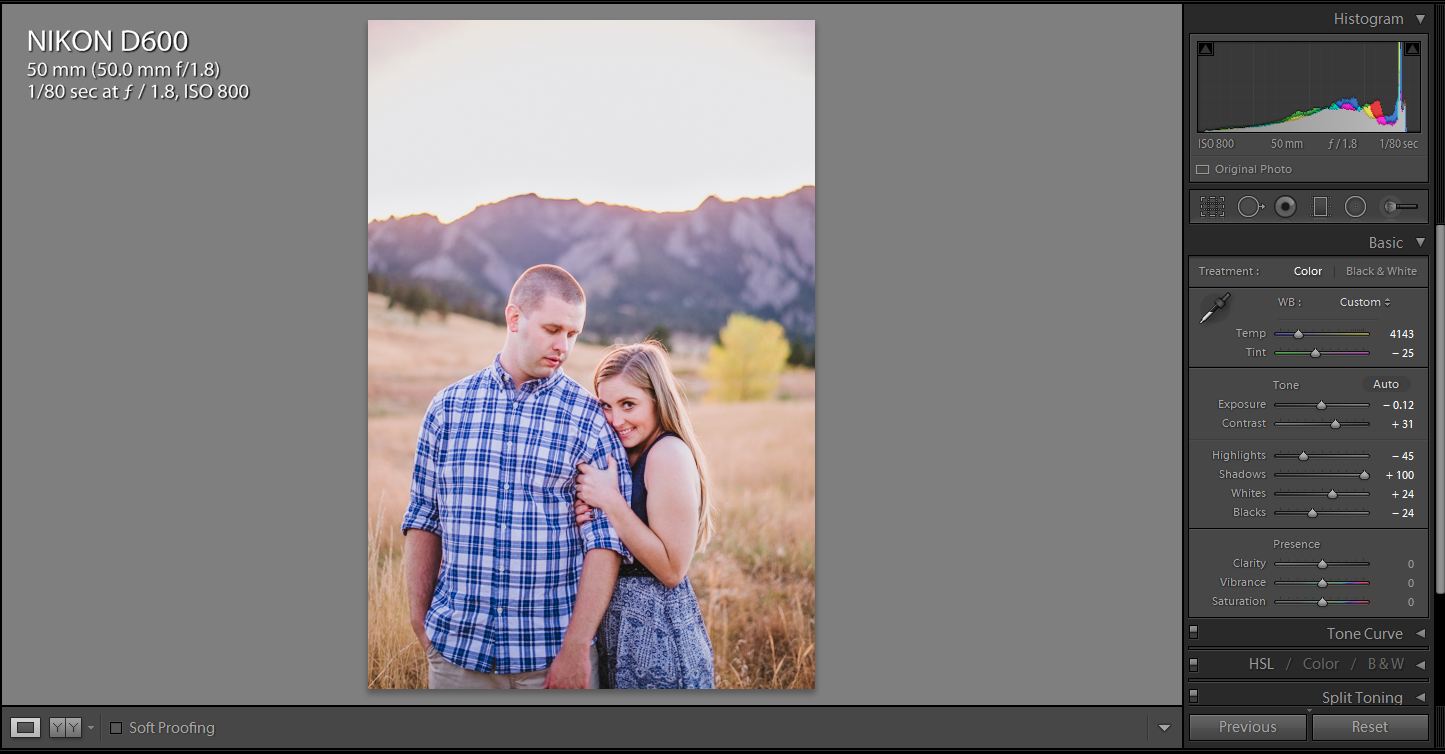
So above I underexposed a little and it still wasn’t enough to save the sky. That doesn’t mean I don’t like the final look of the delivered image. I like this look a lot and it was my bread and butter style of shooting for a long time.
Here are a few more before/after examples.
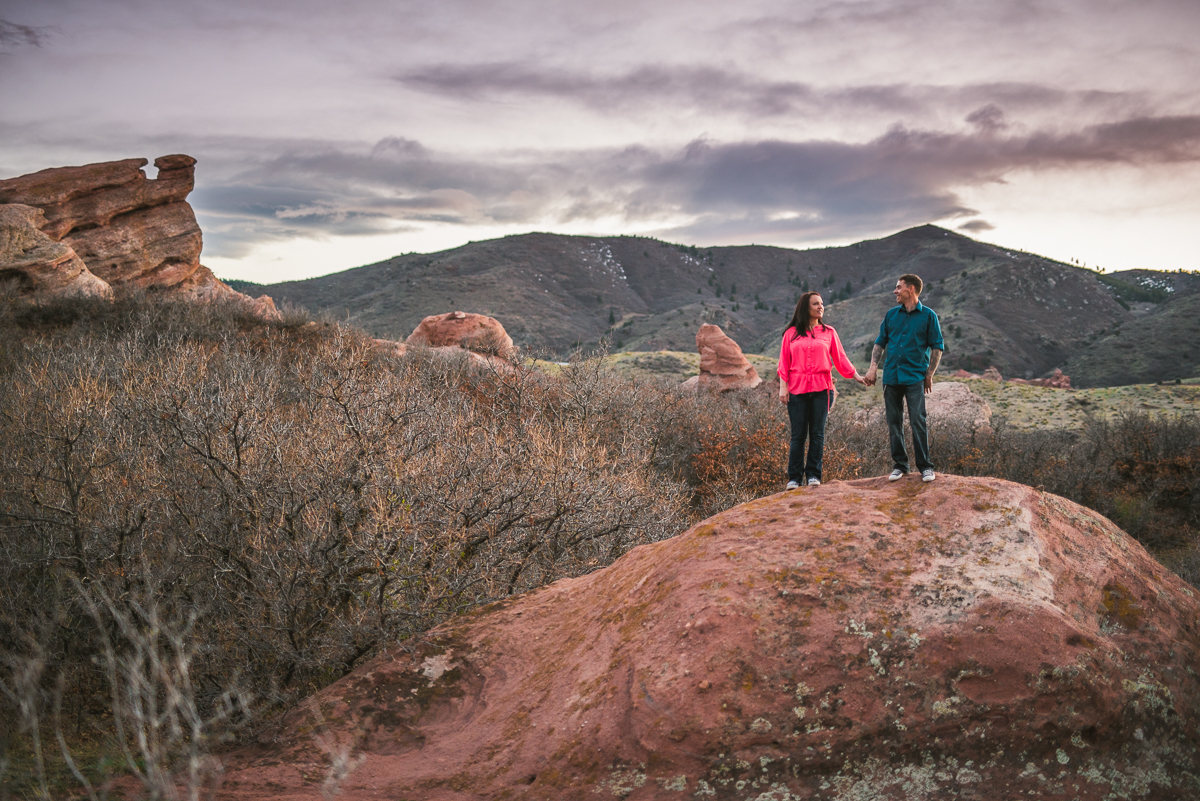
-2.5 stops below skin exposure @ f/1.4, 1/200 sec, iso 500. Nikon D750, Sigma 50 1.4 Art Lens.
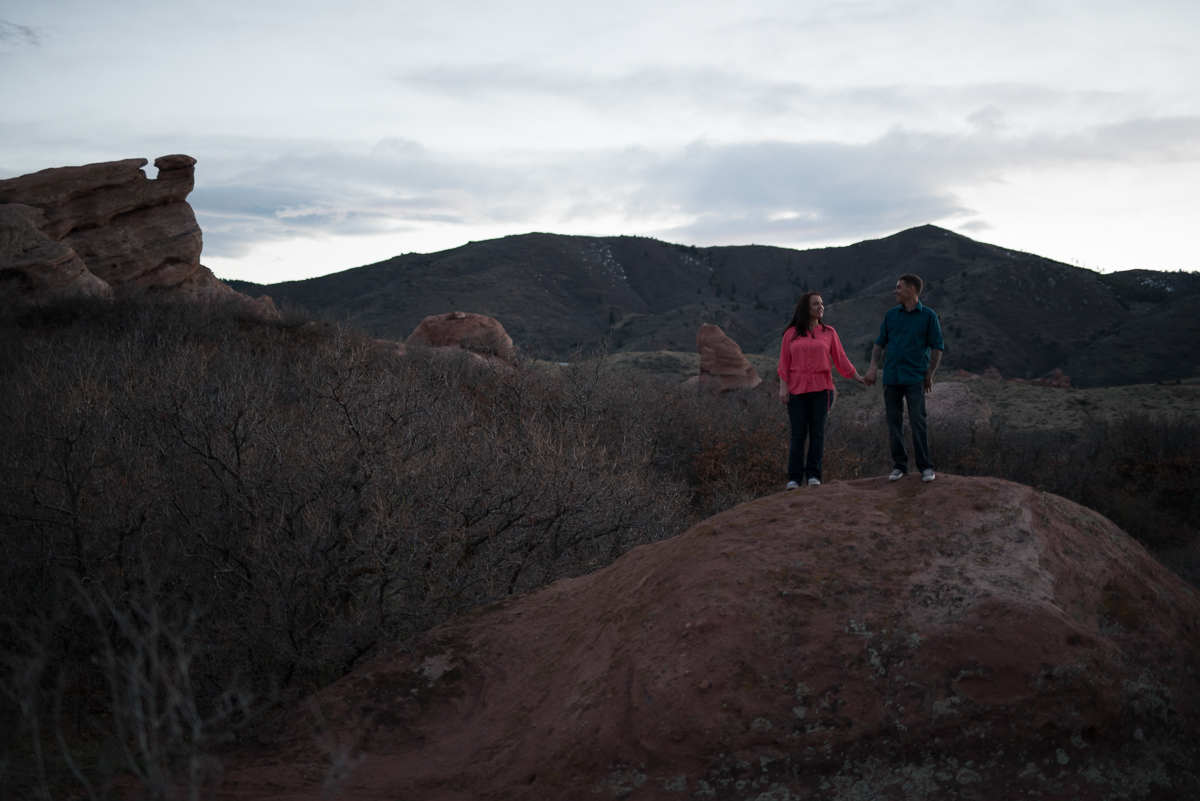
+.60 Exposure, -100 highlights, +100 shadows, +21 Contrast, -29 blacks, Custom WB, Tone Curve, Split Toning. Lowered Exposure Gradient on the sky.
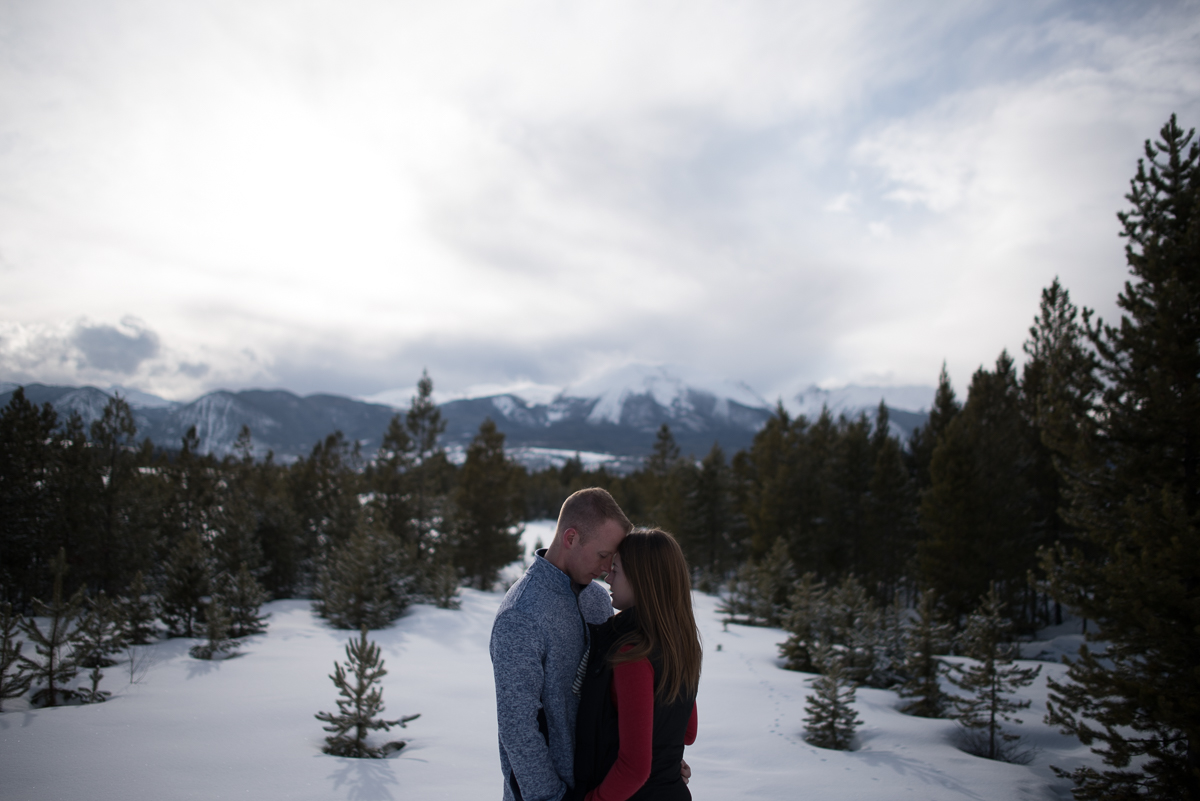
-2 stops below skin exposure @ f/1.8, 1/4000 sec, iso 100. Nikon D750, Nikon 28 1.8G Lens. Snow and clouds can be tricky because they both are very easy to blow out.
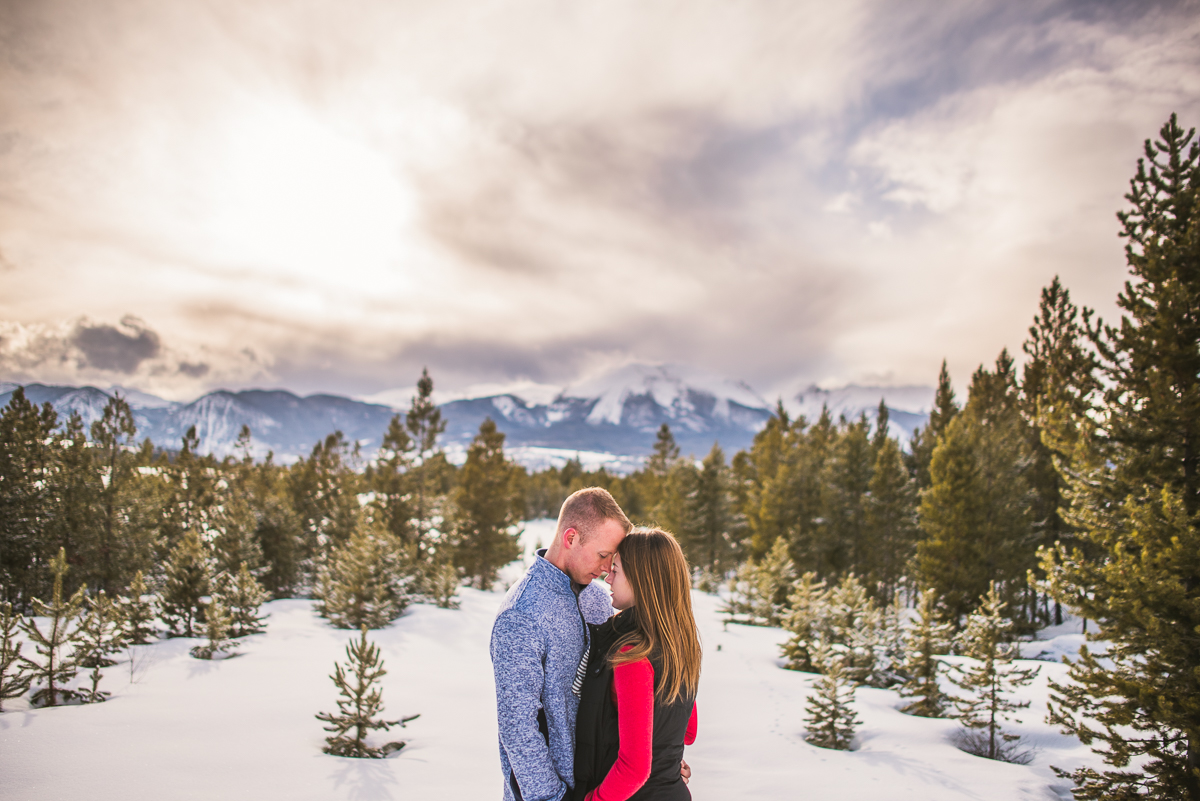
+0.48 Exposure, -100 highlights, +100 shadows, +24 Contrast, -29 blacks, -64 whites. Custom WB, Tone Curve, Split Toning. Lowered Exposure Gradient on the sky.
-2 stops below skin exposure @ f/1.8, 1/125 sec, iso 100. Nikon D600, Nikon 50 1.8G Lens.
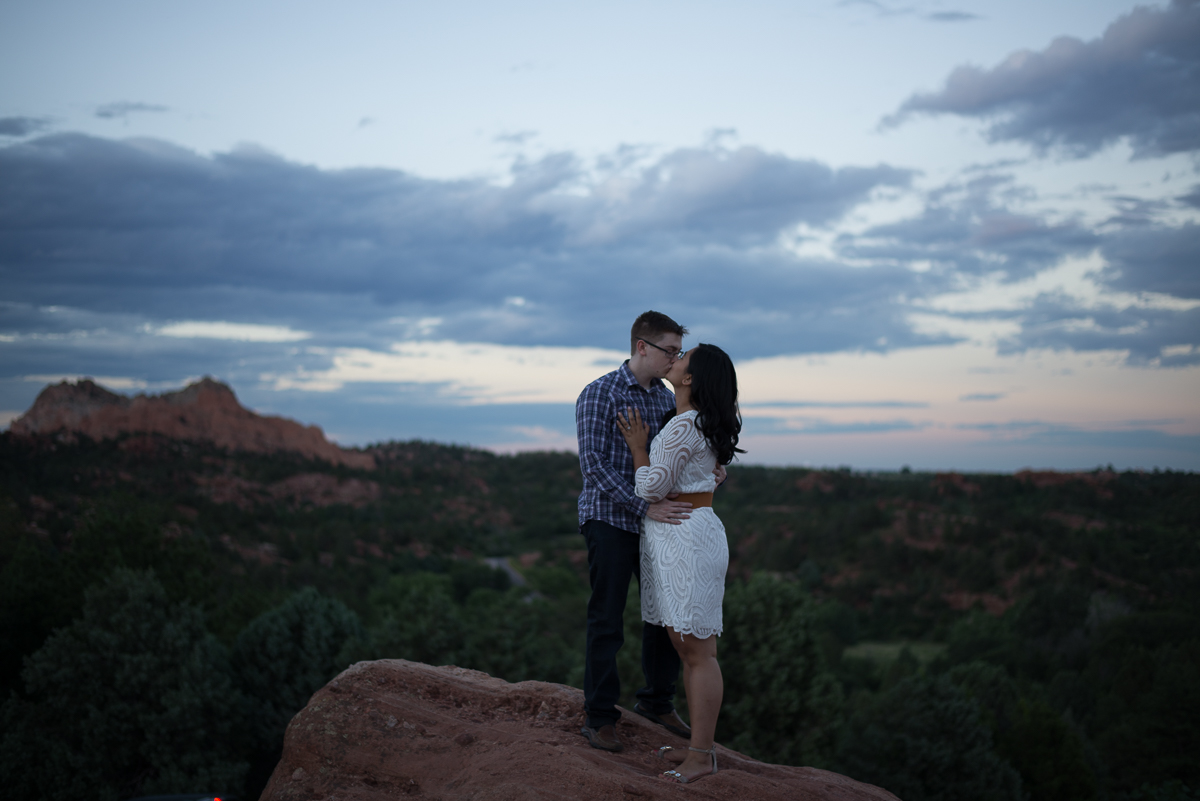
+0.60 Exposure, -100 highlights, +100 shadows, +21 Contrast, -29 blacks, +7 whites. Custom WB, Tone Curve, Split Toning. No brushing or gradient filter on sky.
What’s the take away? Do you need to shoot everything at 2-3 stops below the exposure of the skin tones? No way. I feel pretty confident that all of the above scenarios could have created a pleasant image while shooting on the overexposed side. The point is that it’s nice to have options and you can feel confident in your equipment in almost any scenario thanks to these crazy modern DSLR sensors.
Thanks for reading!
